MVC Form Rendering
Sitecore forms are rendered on page through MVC form rendering. If you are using Sitecore SXA, rendering is available through the Sitecore Form Wrapper. Once you add the MVC form to your page, you can then select the form that needs to be included. But first things first: how to create your form?
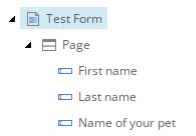
Creating your form in Sitecore
When creating a new form, you always start off with your page.
On the right side you will find the Form Elements. Going from bottom to top we have the following options:
Structure
-
Create new pages
-
Adding sections to pages
-
Submit buttons
Security
-
Password
-
Password confirmation
Lists
-
Dropdown
-
List box
-
Checkbox list
-
Radio button list
Basics
-
Form fields
-
Plain text
For a page, you have the possibility to give this a name.
TIP: for each element you place on a form be sure to give it a logical name. This way if you look through the Content Editor you can identify the different meanings of the form elements by name.
Bad example for naming convention:

Drag and drop
You can easily add new fields to your form – just drag and drop the items you wish to place on the page.
Please note with every change you make to an element on the form, you need to save your changes. Also remind yourself to press apply after every change, and to actually save your work afterwards – if you forget either or, your changes will not be saved.
If your session expires and you haven’t saved your changes, they will be lost as well.
List elements
With list elements, you are able to enter static information or use a dynamic data source. Data sources can be very useful when you want to have certain selection fields with the same data on multiple forms. Example: male or female, country selection or using other fields for yes/no/maybe.
By using a data source for these types of fields, you’ll have a big advantage: if you change something in one form, all changes will follow in the forms that share the same data source. It also creates consistency throughout your forms: no risk of using ‘yes’ in one form and ‘YES’ in another.
Conditions
Conditions are a powerful asset if you want to display information based on a selected form field.
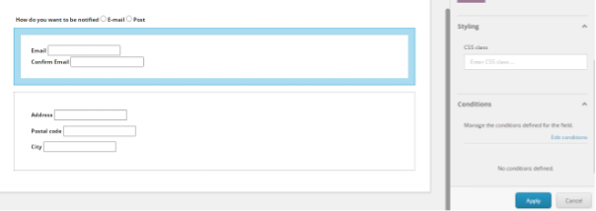
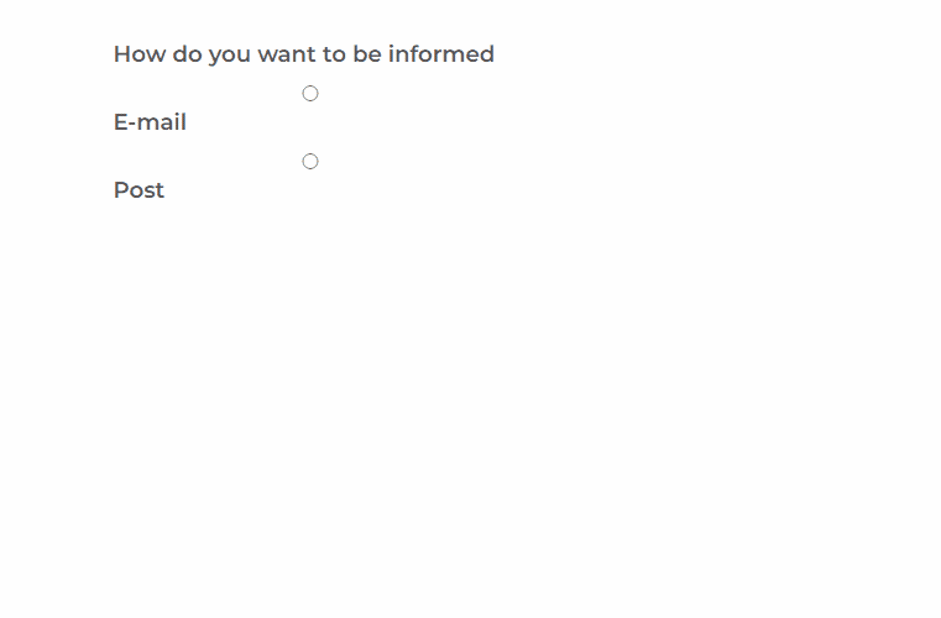
Example: if you have a form where people can select the option to be notified by email or by post – if you have a section placed on your form you can hide it based on the selected option.
Example form:
Click on conditions: if you have selected the section, you can edit the condition.
Another example of why it is so important to name your field correctly:
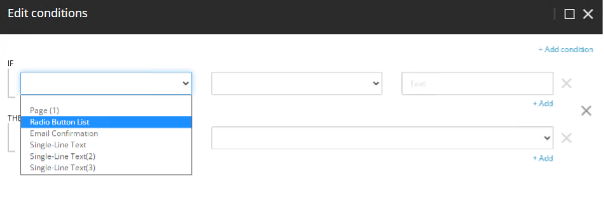
Otherwise, you don’t know which field is what.
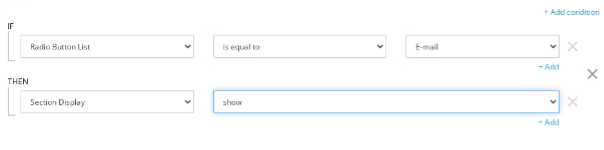
You can select your field, compare it to a value and choose if a field needs to be hidden of shown.
What it looks like on page:
GDPR and Forms
Most integrations for Sitecore now a days have the ability to disable analytics cookie from Sitecore. This due to the GDPR rules for Europe.
Since Sitecore 10 there has been a new feature introduced for Sitecore Forms. This is called “Robot detection”.
This feature will check if the current visitor is stated as robot or actual human. This feature will check the SC_ANALYTICS_GLOBAL_COOKIE. If it is not present this will cause that the user is always seen as a robot and also will block all form submits.
Though it is important to note that Sitecore mentions “Please note that disabling this feature is not recommended by Sitecore and you must turn it off at your own risk.”
But it is something important to know and therefore understand the behaviour of the forms and why it might not be working.
Sitecore Form Extensions
The Sitecore Forms Extensions are a great addition to have more options to use on forms. Keep in mind that, for each version of Sitecore you will need a different version of the Sitecore Forms Extensions. Check out what version you require on GitHub.
Included in the Sitecore Forms Extensions:
Custom fields
-
Hidden Field
-
RawHtml
-
Recaptcha
-
Robot Detection
Send email
-
Gives you the possibility to send an automated campaign email from EXM
-
Choose to whom you send the email: current contact, a fixed email address, to a form field value
Prefill form fields
-
Use known contact information to prefill form fields
-
Option to store field information to the contact
Value Provider Conditions
-
Using the above Prefill option only if certain conditions are met
In place thank you message
Lastly, we want to shed some light on the known issues with forms up to Sitecore 10.1:
When using Sitecore SXA, it is easy to create overlays. The overlay can show content in a popup window. Currently it is not possible to use Forms inside the overlay (in Sitecore 10.2.x there has been a fix for this).
All in all, Sitecore forms are an easy way to include forms on your website. Don’t hesitate to get in touch if you need help with setting up yours.
Get in Touch
Ready to take your digital experience to the next level? Feel free to contact us to learn more about our services and how we can help you leverage the full potential of your digital marketing.
Tell us about your project
And we'll come up with a tailor-made solution
Get in touch with one of our consultants to find the perfect match that fits your needs and enables you to grow.